In this article, you will learn how to install Turnkey WordPress on your server by following the below steps. TurnKey WordPress helps save you time and money by providing a ready-to-run WordPress solution that is secure, supported, and easy to maintain. The system auto-updates itself with security fixes and is built in a transparent 100% open source process free of hidden backdoors.
Before starting please note that in order to efficiently operate a WordPress site a set of minimum requirements regarding hardware, based on our experience is needed to be fulfilled:
- Disk space/Storage: 512 MB
- RAM: 512 MB
- Processor (CPU): 1-core, 1-thread
The above is the minimum hardware requirements we recommend. Please note this does not mean that in any case and under heavy traffic the above setup would suffice ( it will not actually) rather than it is a starting point to mainly test WordPress.
Log in to MassiveGRID's Secure Customer Portal (https://portal.massivegrid.com/clientarea.php)
Go to Services > My Services
Select the active Server, you need to re-install OS.
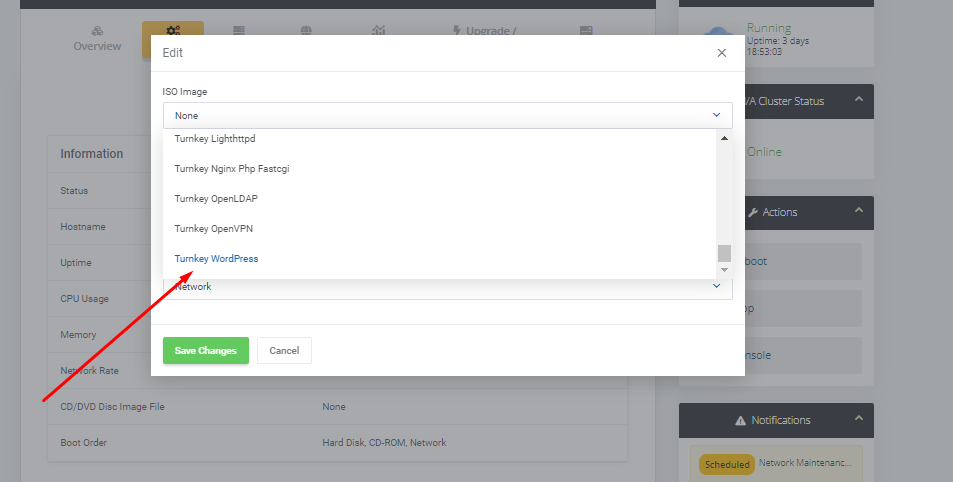
- On "Manage Product" page check choose the appropriate ISO regarding WordPress installation as shown at the screenshot and boot the server:

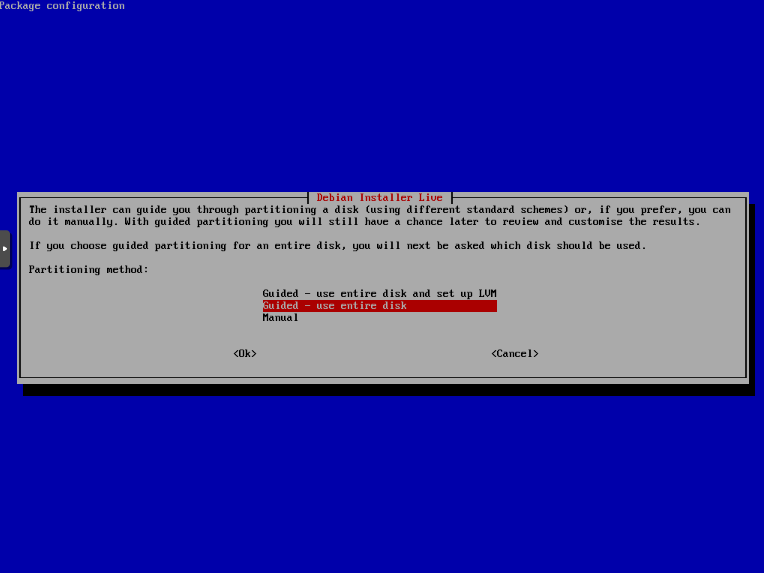
- Use the console in order to proceed with the rest of the setup. You can either choose LVM based partitioning or simple partitioning :

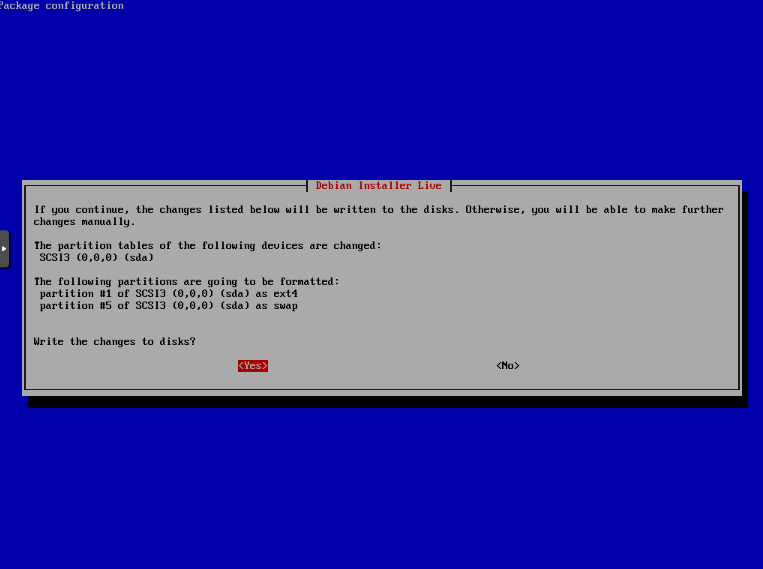
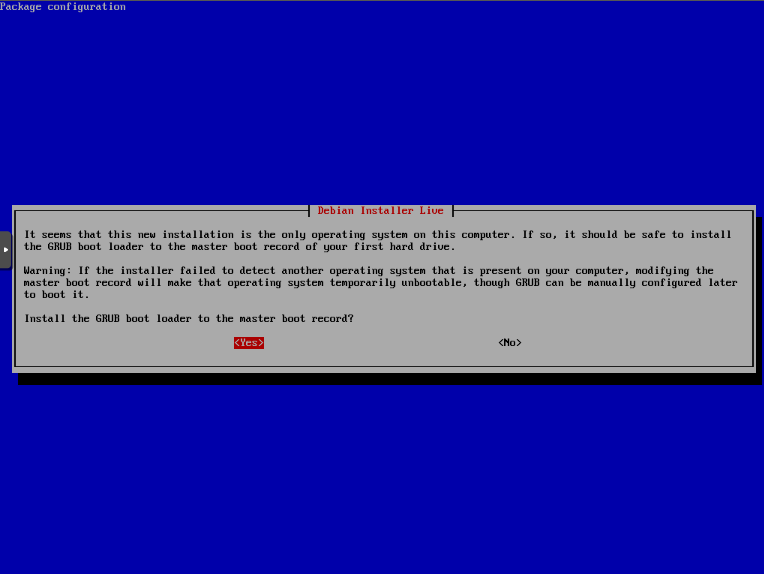
- Choose Yes in order to write the changes to the partition table based on the above selection

- Install the GRUB boot loader as MBR

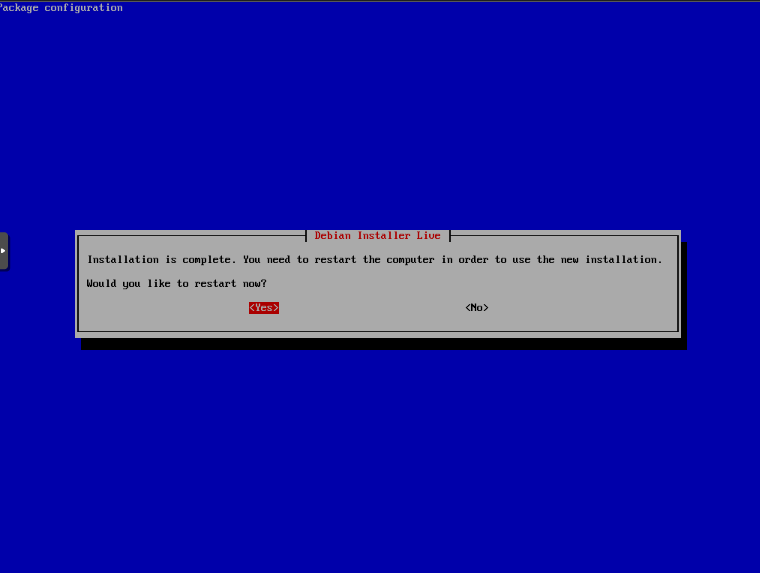
- You will then need to restart as the basic installation has now been completed and a few other steps are remaining to be done.

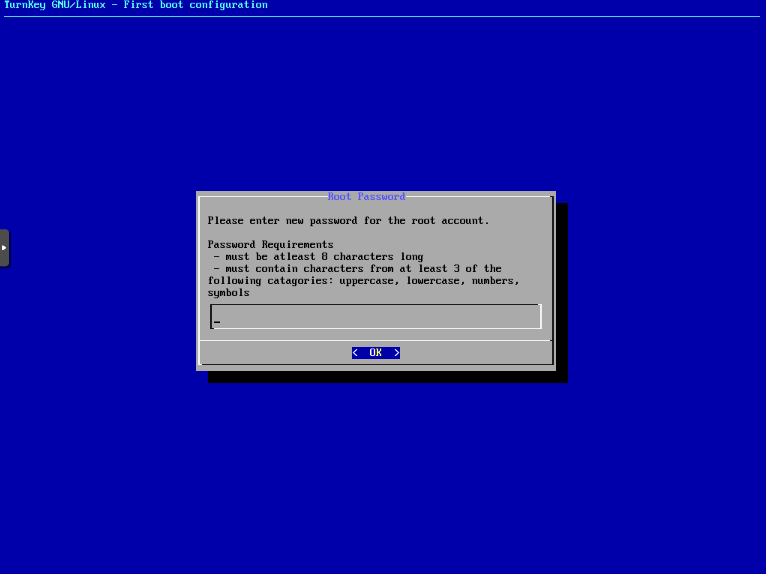
- Next, you should be providing your own passwords regarding the basic services of the server. This includes SSH, MySQL, and also wp-admin credentials. You will be getting a separate window in each case:

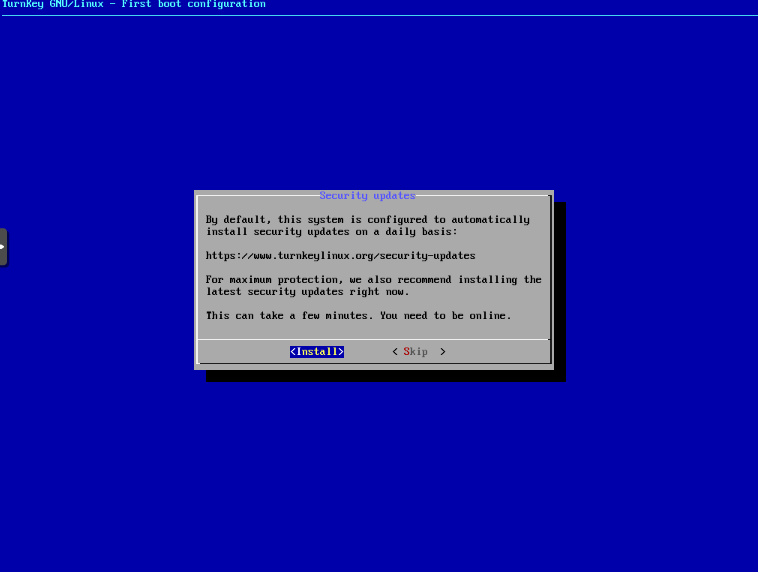
- We recommend updating the installation in order to ensure maximum security measurements are taking place, so in the following screen you should be choosing Install:

- Before finalizing the installation, we recommend keeping a note of the extra management services that come along it. This includes web shell access and also Webmin access. Obviously, those can be removed/disabled if not needed. And we actually recommend removing these unless needed.
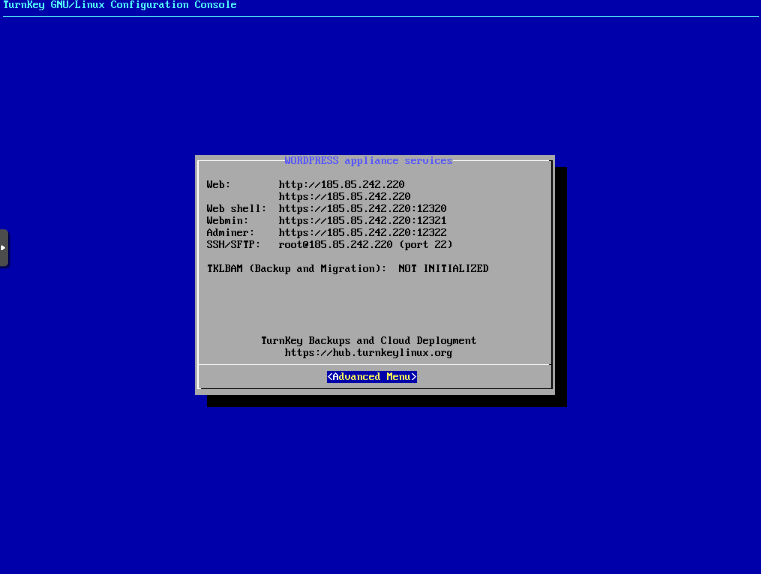

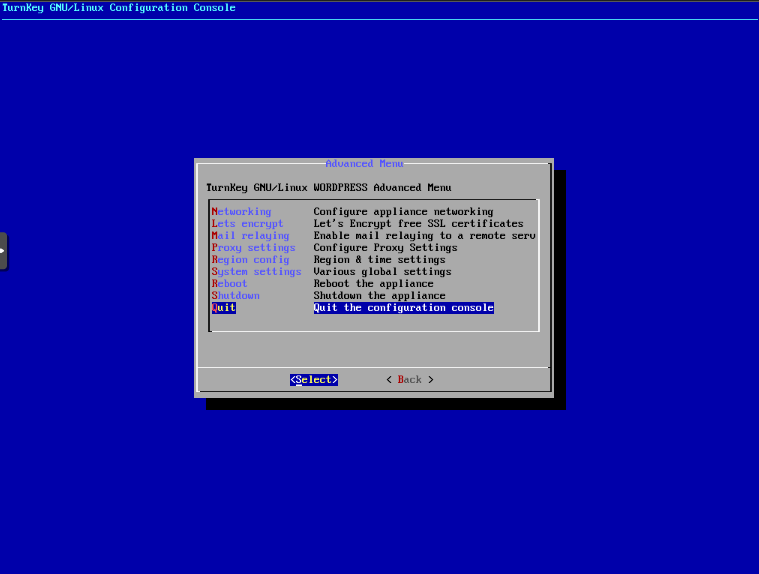
- Finally, you should quit the configuration console in order to be presented with the normal login prompt and also be able to access the server using SSH and the credentials configured before.

- You can now access your WordPress admin dashboard by navigating to your server's IP at https://IP/wp-admin using the credentials previously configured.