In this article, you will find instructions on how to install Plesk on Windows Server OS.
Requirements
- 2 GB of RAM
- 30 GB of free disk space
- Windows Server 2012 R2 / 2016 / 2019 (Datacenter or Standard 64bit)
- More detailed information can be found here: https://www.plesk.com/blog/various/plesk-requirements-hardware-software/
First, we recommend performing the installation using an RDP connection to your Windows server.
General Steps
Step 1: Download the Plesk Installer from here- https://installer-win.plesk.com/plesk-installer.exe
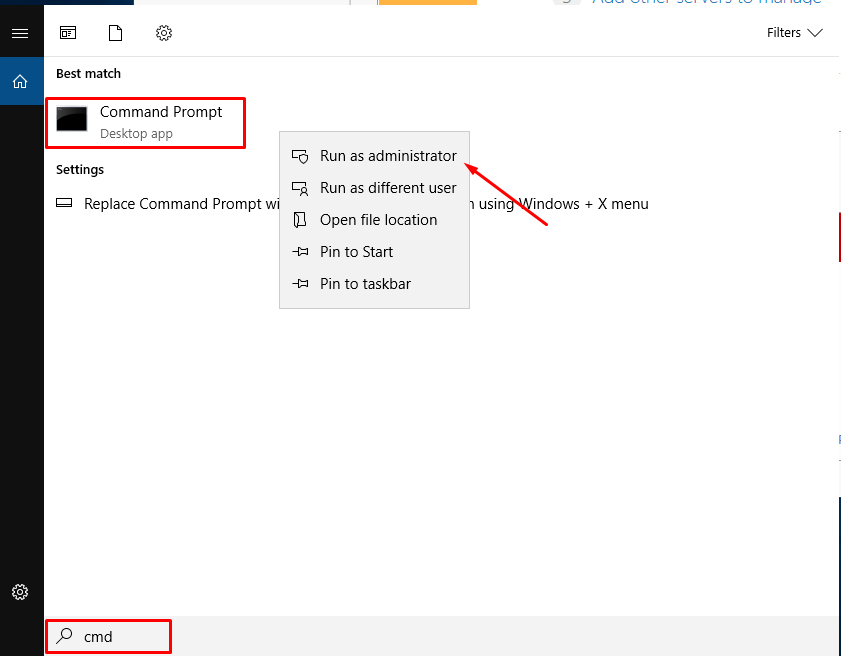
Step 2: Find the Windows command prompt from the Search bar and with Right-click select Run as Administrator.
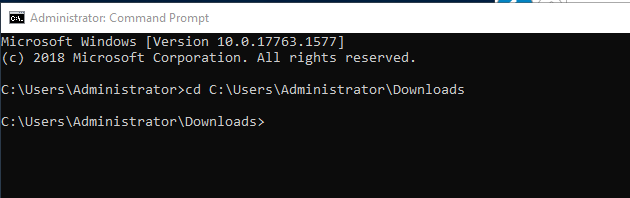
Step 3: Navigate to the directory where the installer was downloaded
cd C:\path\to\installerDirectory
For this guide, we will use the Downloads directory
cd C:\Users\Administrator\Downloads
After the above steps, there are three ways to perform the installation:
- One-Click Installation
- Console Installation
- GUI Installation
For One-Click Installation
You only need to run the below command:
plesk-installer.exe --select-product-id=panel --select-release-latest --installation-type=recommended
The installation process will now begin and may take 30 to 60 minutes.
The installer will download the latest stable version of Plesk.
You can add any additional Plesk components and features at any time but if you wish a more controlled installation you can follow the Console or GUI Installation.
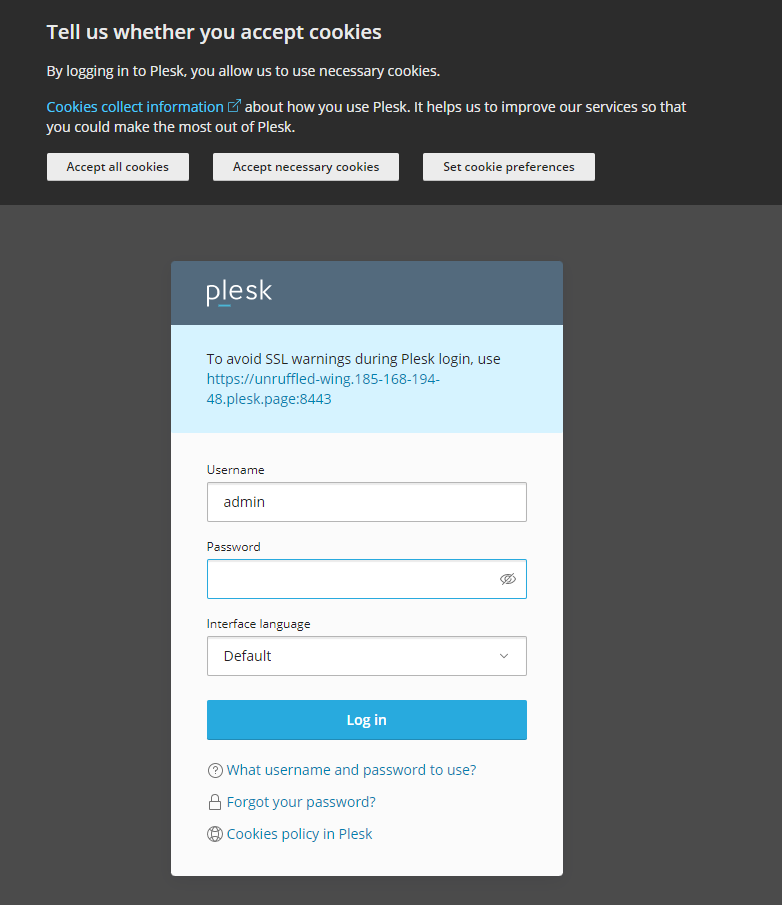
After the installation process is completed navigate to your Plesk for the post-install configuration
https://yourDomainNameorServer’s_IP:8443
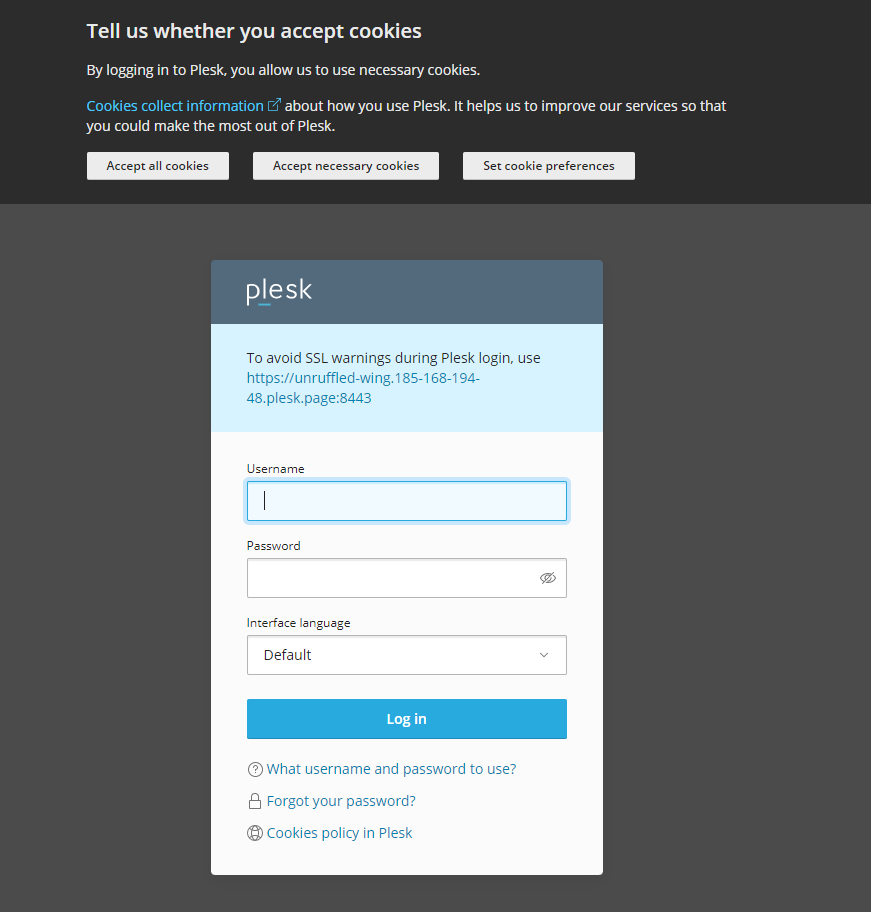
For username and password use the credentials of your server.
Final Step: Post-Installation Configuration section at the end of this article.
For Console Installation
Run the installer by running the following command:
plesk-installer.exe --console
The installer will install the latest version of Plesk.
If you wish to install an earlier version run the following command
plesk-installer.exe --console --all-versions

Step 1: Type the F option and press Enter in order to proceed with the installation.
Then a list of files will be downloaded and you will be asked the below
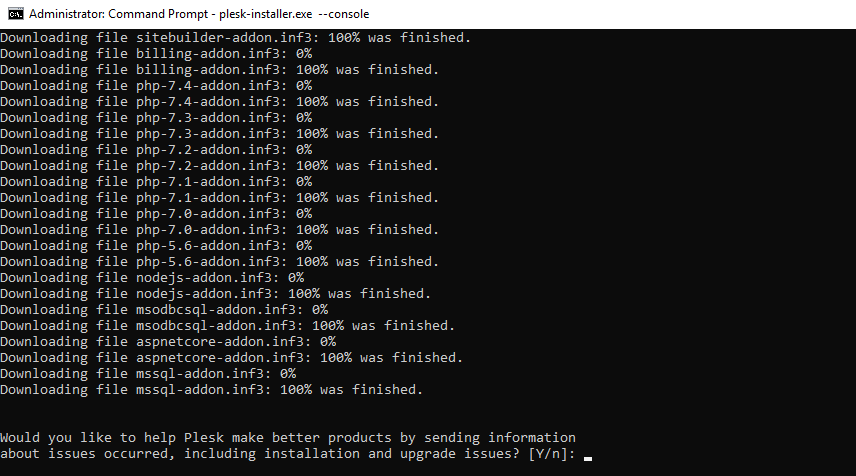
Step 2: Type either Y or n option and press Enter.
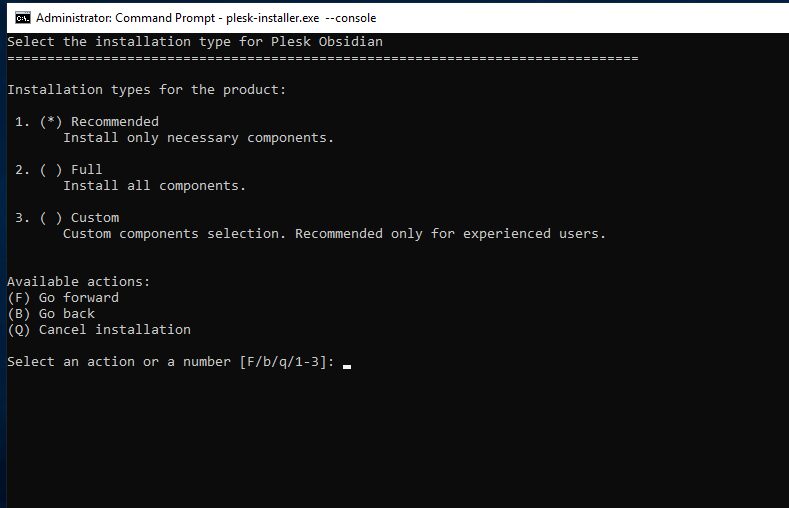
Step 3: After that, you will have to choose which type of installation you want.
Note: If you run the installer with the --all-versions option you will get a different list of available Plesk versions.
- Recommended type - has components necessary that you need for web hosting, such as web server, mail server, database server, and features.
- Full type - has everything that Plesk has to offer but note that with this type more space of your disk will be filled.
- Custom type - allows you to make all the choices regarding configuration and features but it is recommended to be used only by Plesk administrators.
In this guide, we will proceed with the recommended type of installation by choosing the option F and pressing Enter.
Type the F option and press Enter in order to proceed with the installation.
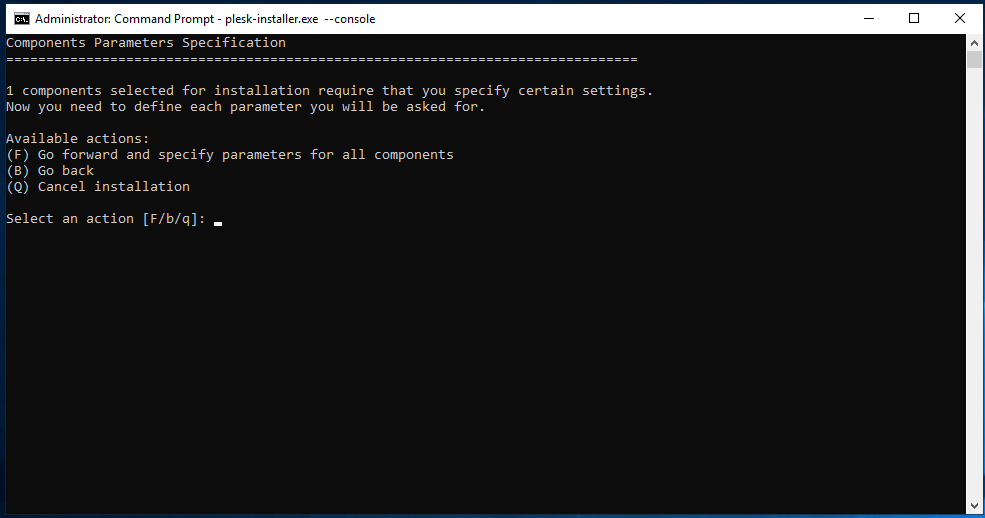
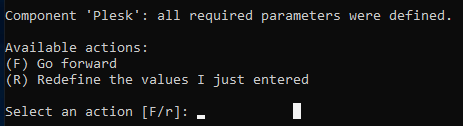
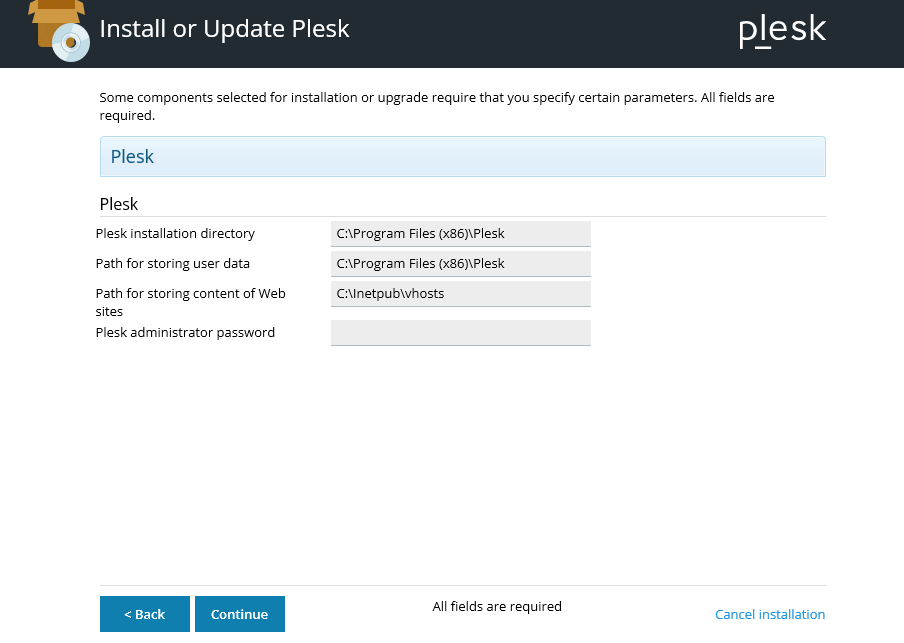
Step 4: Then you will be asked to set some components such as the directory where Plesk should be installed along with the password you wish for the admin user.

You can press Enter for the first 3 components if you wish to set the default choices that are in brackets [ ].
Step 5: Type the F option and press Enter in order to proceed with the installation.
Step 6:Then will be informed of which packages must be upgraded and which extra packages must be installed on your system.
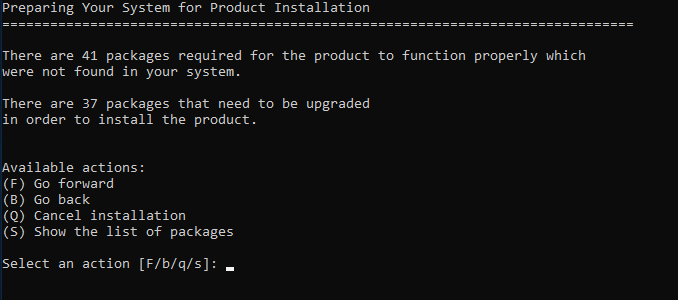
If you wish to see first the list of packages type the S option and press Enter.
Otherwise, type the F option and press Enter in order to proceed with the installation/updates of the packages.
The process may take several minutes ( 30 - 60).
Step 7: After the process is completed you can navigate to your Plesk for the post-install configuration
https://yourDomainNameorServer’s_IP:8443
In the password field, you have to type the password you set during the installation process(Step 4).
Final Step: Post-Installation Configuration section at the end of this article.
For GUI Installation
Run the installer by running the following command:
plesk-installer.exe --web-interface
The above command will initiate the installer GUI in your browser.
If you wish to install an earlier version run the following command:
plesk-installer.exe --web-interface --all-versions
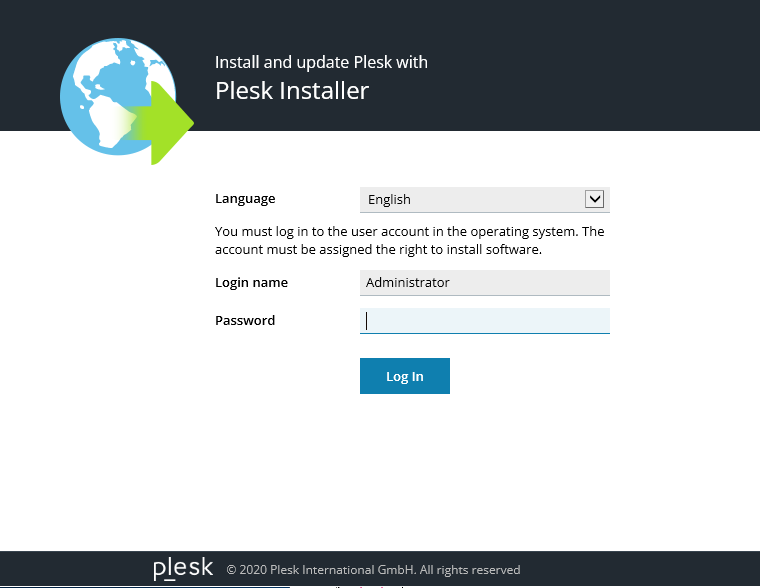
Step 1: Select your preferred interface language and log in with your Windows Server credentials.
Step 2: Select the below option in order to continue with the installation.
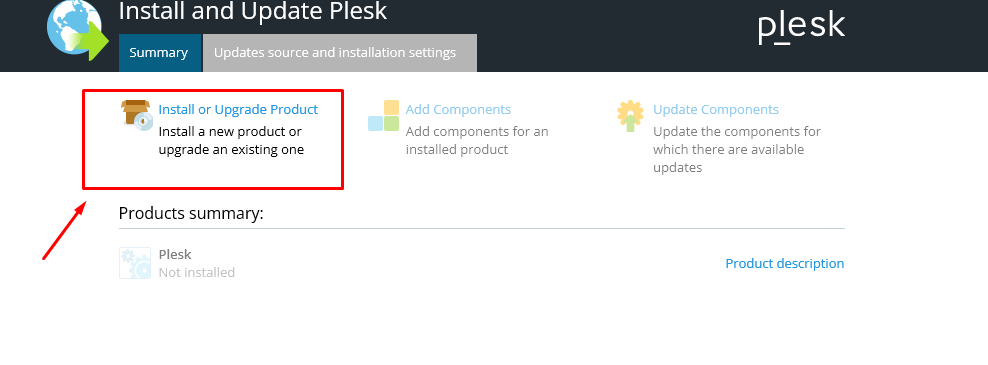
Note: If you wish to change the installation settings navigate to Updates source and installation settings.
Here, you can change the source of the installation, the installation’s storage directory, as well as configure the HTTP proxy server, and last change the language of the installer’s interface.
If you make any changes to the above settings, the next step is to press Save and continue with the installation process.
Step 3: Select the version of Plesk you wish to install.
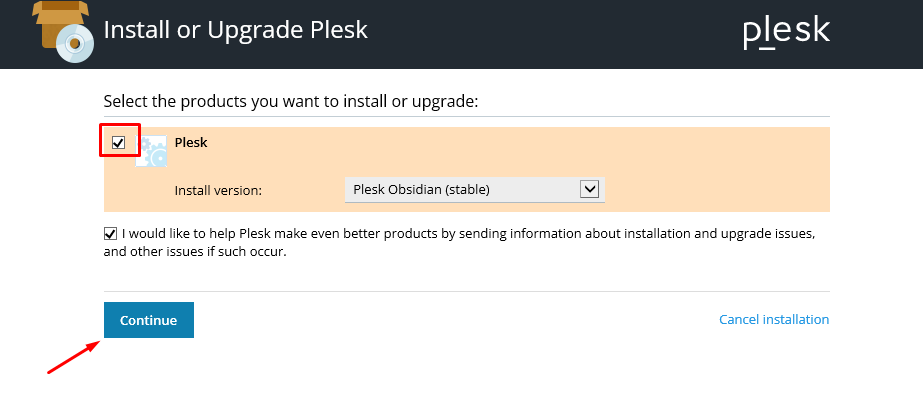
Note: You will get only one option, the latest stable version of Plesk, unless you had run the installer with the --all-versions option.
Step 4: Select the type of installation.
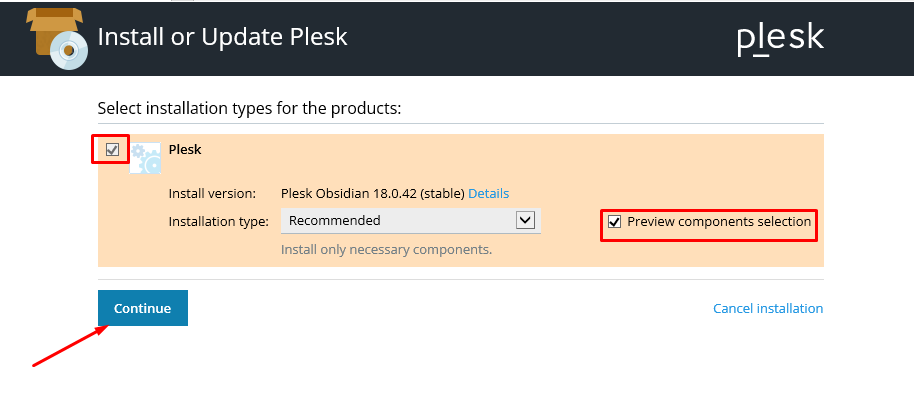
You can view the meaning of the different types in the section For Console Installation.
Note: Despite the type, you will choose, you will be able to add or delete Plesk components after the installation finishes.
Step 5: Select any additional packages you wish to install.
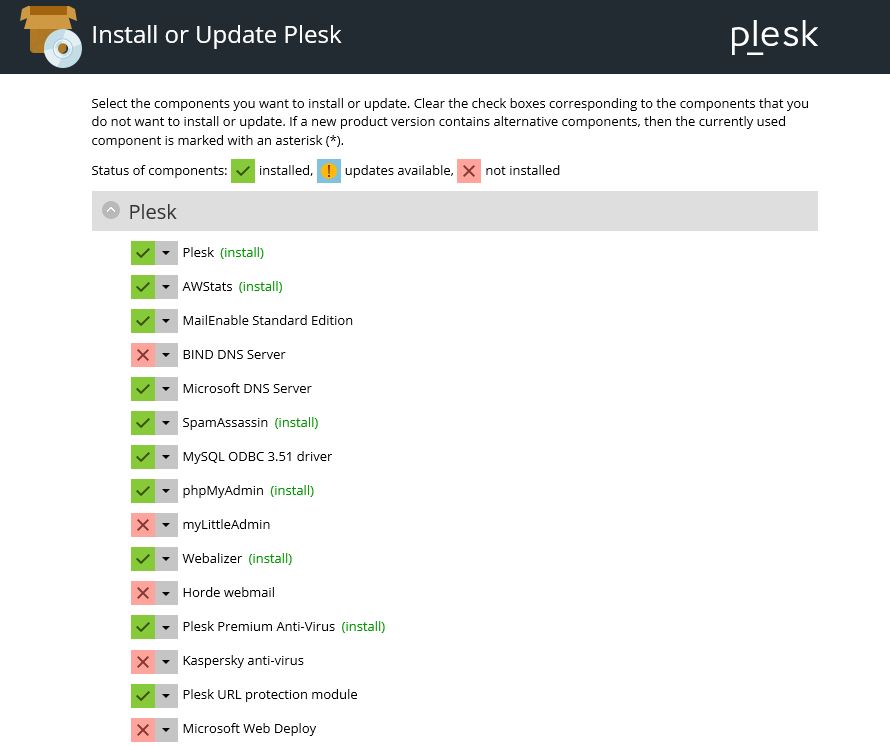
Step 6: View the components and change them according to your needs or leave the default options. Also, you will have to set the password for the admin user.
After the above actions, click Continue.
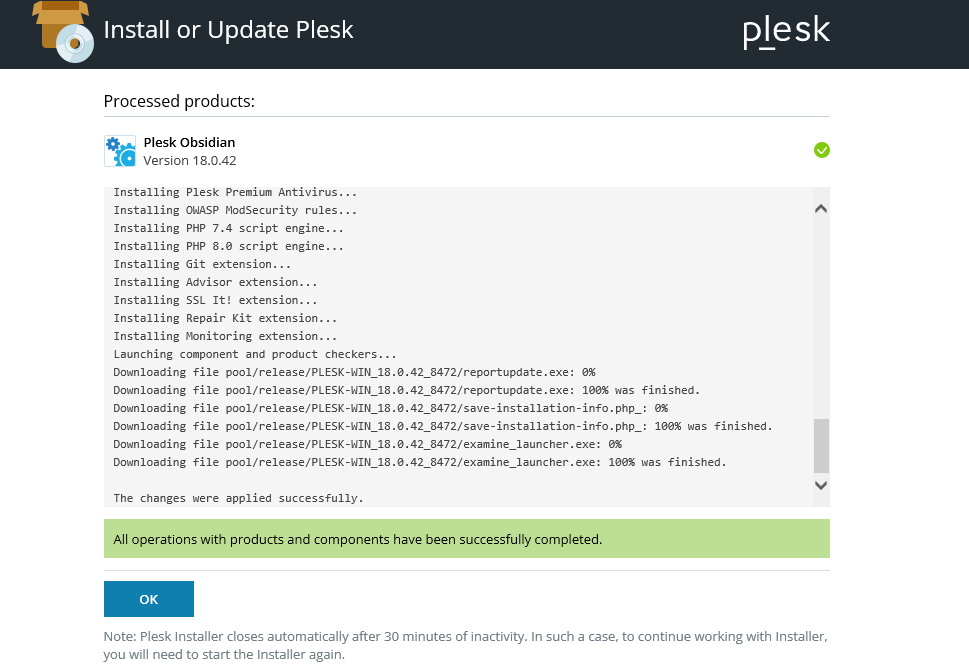
Step 7: After the process is completed click OK.
Now, you can navigate to your Plesk for the post-install configuration.
https://yourDomainNameorServer’s_IP:8443

In the password field, you have to type the password you set during the installation process(Step 6).
Final Step: Post-Installation Configuration section at the end of this article.
Post-Installation Configuration
After all the steps have been completed, you will be prompted to change the password and your username will be admin, as well as configure the setting regarding your License type.
Regarding the license type:
- In case you have purchased a license from MassiveGRID, you will have to contact our Support Department in order to provide you with the activation code or proceed with the activation on your behalf.
- If you have your own license, you can enter the activation code on the section Proceed with a paid license.
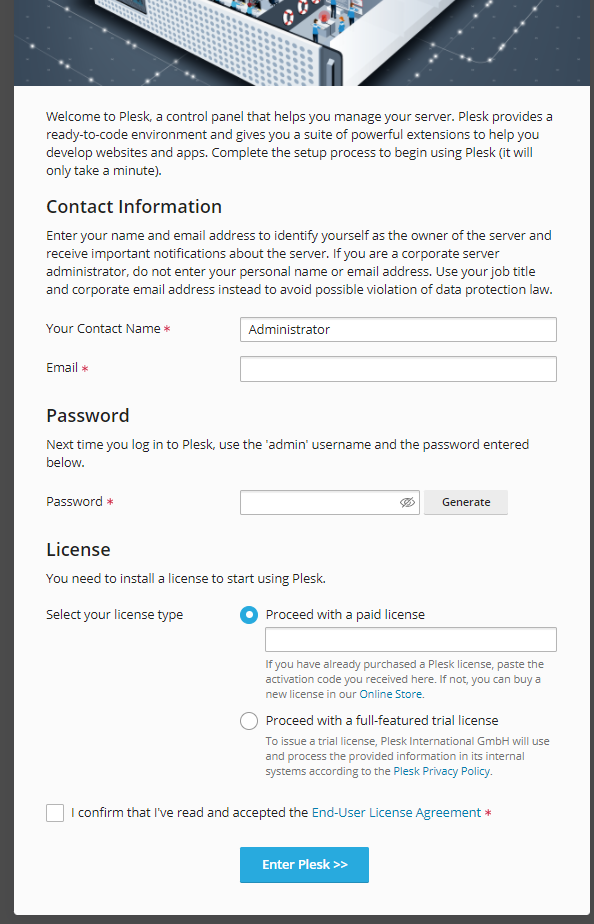
Now you can explore your Plesk account.