n this article, we will guide you on how to install MySQL and PHP on your Windows Server Operating System. Make sure that before you proceed with this guide that you have successfully installed IIS Services (add hyperlink here) on your server.
Installing MySQL
In order to start the installation procedure, it is required to download MySQL installation file, based on your needs, from here: https://dev.mysql.com/downloads/mysql/
The installer should be either the 32-bit or 64-bit version of MySQL depending on your system.
For this guide, we will use MySQL Installer 8.0 for Windows and there are the following selections/setup types once you launch the installer :

Developer Default :
Installs the MySQL Server and the tools required for MySQL application development. This is useful if you intend to develop applications for an existing server.
This Setup Type includes:
-
MySQL Server
-
MySQL Shell
The new MySQL client application to manage MySQL Servers and InnoDB cluster instances. -
MySQL Router
High availability router daemon for InnoDB cluster setups to be installed on application nodes. -
MySQL Workbench
The GUI application to develop for and manage the server. -
MySQL for Visual Studio
To work with the MySQL Server from VS. -
MySQL Connectors
Connector/Net, Java, C/C++, OBDC, and others. -
Examples and tutorials
To help you get started with your development. -
Documentation
Allows you to read the documentation offline.
Server only :
Installs only the MySQL Server. This type should be used where you want to deploy a MySQL Server, but will not be developing MySQL applications.
Client only :
Installs the tools required for MySQL application development, but does not include the MySQL Server itself. This is useful if you intend to develop applications for an existing server.
This Setup Type includes:
-
MySQL Shell
The new MySQL client application to manage MySQL Servers and InnoDB cluster instances. -
MySQL Router
High availability router daemon for InnoDB cluster setups to be installed on application nodes. -
MySQL Workbench
The GUI application to develop for and manage the server. -
MySQL Visual Studio Plugin
To work with the MySQL Server from VS. -
MySQL Connectors
Connector/Net, Java, C/C++, OBDC, and others. -
Examples and tutorials
To help you get started with your development. -
Documentation
Allows you to read the documentation offline
Full :
Installs all of the products available in this catalog including MySQL Server, MySQL Shell, MySQL Router, MySQL Workbench, MySQL Connectors, documentation, samples and examples, and much more.
Custom :
Allows you to select exactly which products you would like to install. This also allows picking other server versions and architectures (depending on your OS).
Based on the setup you wish to start on your server, you can select one of the above setup types in order to proceed with MySQL deployment. A common installation type is a Full installation that installs all of the products such as MySQL Server, MySQL Shell, MySQL Router, MySQL Workbench, MySQL Connectors, etc.
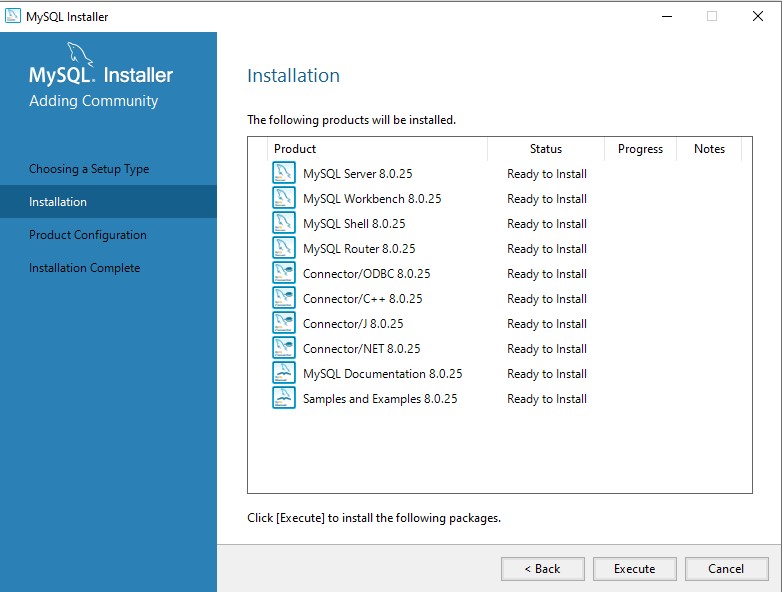
In this guide, we used the Full setup type and after the selection the next window prompted should be like the screenshot as shown with a preview of the products that will be installed. To start the installation, click on Execute. (Add image 2 here)
Once the installation completes, the next step is Product Configuration. Inside this step, you will have two options :
- Use the server's Administrator user as the MySQL root user
- Create a new user as the MySQL root user
After the installation finishes, it will offer to open MySQL Workbench where you can ensure that you’re able to login to your new database server. Another option is to open the MySQL 8.0 Command Line Prompt from the Start menu and type in the password that you set for the MySQL root account.
Install PHP
To install PHP for Windows Server Operating System, it is required to download the Windows PHP files from http://windows.php.net/download.
After you’ve downloaded the PHP files, unzip the package to the directory of your choice on your hard drive. We suggest choosing the path c:\php to keep things simple. The package includes PHP. ini-production file which you will need to rename as php.ini and copy to your c:\windows directory after making a few changes. This file holds keys and settings, many of which are commented out and can be uncommented to apply specific settings as needed.
Open a text editor like Notepad++ or default the default Notepad Editor on Windows and uncomment the following keys in php.ini by removing the semi-colon from the beginning of the line and change the settings as follows:
cgi.force_redirect = 0
fastcgi.impersonate = 1
Set extension_dir to the folder where you store the PHP extension files. It is necessary to use the full path  (i.e. C:\PHPext\).
date.timezone should be set to the time zone of your server
The date.timezone setting is a string value and you can find a list of appropriate values to insert at http://php.net/manual/en/timezones.php.
In order for PHP to function with MySQL, you will also need to uncomment the following lines in the Windows Extensions section :
extension=php_curl.dll
extension=php_mbstring.dll
extension=php_mysql.dll
extension=php_mysqli.dll